
Assembling a chainsaw

Home / Assembling a chainsaw

Do you want to assemble your chainsaw yourself? We show you how to properly mount a chain on a chainsaw and how to get the machine ready for use in just a few minutes.


Stihl Assembling Chainsaw1


Assembling a chainsaw: safety first


Make sure the chainsaw is switched off and cannot start during assembly.


  • On a cordless chainsaw remove the battery and engage the chain brake.
  • When using an electric chainsaw you must unplug it and engage the chain brake.
  • On a petrol chainsaw switch off the engine and set the combination lever to position 0. Engage the chain brake.
  • Always wear work gloves made of sturdy material.


Saw Wheel Installation: Correct Installation of the Guide Bar and Chain


The saw attachment is identical for both battery-powered and petrol-powered electric chainsaws. The individual steps depend solely on the position of the chain tensioner on your STIHL chainsaw. More information about ourchain and rod systemscan be found in our article on this topic.

Stihl Assembling Chainsaw 21

Assembling a chainsaw: quick-release


With all STIHL chainsaws equipped with a quick tensioner for the chain you can quickly easily and conveniently mount the saw attachment without tools. All you need to mount the saw attachment is aflat screwdriver.

Follow these steps:


Step 1: Remove the chain sprocket cover

Open the wing nut lever and turn the nut counterclockwise until you can remove the gear cover. Remove the gear cover.


Step 2: Remove the tension wheel

Now remove the tension knob and place it so that the screw on the back is accessible. Loosen the screw.


Step 3: Release the chain brake

Release the chain brake by pulling the chain brake lever towards you.


Step 4: Installing the idler wheel

Place the saw blade on the tension wheel so that the two pins on the tension wheel are in the holes in the saw blade. The direction of the saw blade does not matter: the print on the saw blade can also be upside down.

Replace the screw and tighten it.


Step 5: Place the chain on the chainsaw

Make sure you use the combination of guide rail and saw chain that is specified in the instruction manual for your machine. Now place the saw chain in the groove of the guide rail with the nose of the guide rail pointing downwards. Check that the arrows on the connecting links of the chain point in the direction of travel. Turn the tension control as far to the right as possible.


Step 6: Installing the saw blade

Turn the saw blade so that the tension wheel is facing you. Now place the saw chain on the sprocket. The drive links of the chain should engage the teeth of the sprocket.


Now you can mount the bar to the chainsaw. Place the guide bar on the chainsaw and slide it over the collar bolt. Guide the chain drive links into the slot in the bar by turning the tension wheel as far to the left as possible.


Step 7: Install the chain sprocket cover

To secure the pinion cover slide the guide tabs into the holes in the engine housing. Turn the wing nut clockwise until the cover is securely attached to the chainsaw.


Step 8: Tension the saw chain

Lift the nose of the guide bar slightly so that the chain hangs slightly. Turn the tension knob clockwise until it stops. The chain should now be close to the guide rail. The distance to the center of the saw blade should be 1 to 2.15 m millimeters. Here are some more practical tips

in our article on chainsaw tension.


Step 9: Fold back the wing nut

To complete assembly of the chainsaw tighten the wing nut firmly by hand and fold it inward.


Video Tutorial: Quick Chain Release


Chainsaw mounting: side chain tensioner


Many battery and petrol powered machines have a side mounted chain tensioner. The chain tensioners are easily accessible and the risk of contact with hot engine parts is also reduced.


Here's how you do it:

Step 1: Remove the chain sprocket cover

To assemble the chainsaw first loosen the nut with a wrench and remove the sprocket cover.


Step 2: Release the chain brake

To release the chain brake turn the hand guard towards the carrying handle until you hear a click.


Step 3: Move the tension slider

Turn the now visible tension screw counterclockwise until the tension slide on the left side rests against the housing.


Step 4: Place the chain on the chainsaw

Make sure you are using the combination of guide bar and saw chain specified in your machine's instruction manual. Place the saw chain in the guide bar slot with the nose of the guide bar pointing downwards. Check that the arrows on the chain's connecting links point in the direction of travel.


Step 5: Installing the saw blade

Turn the saw blade so that the tension wheel is facing you. Now place the saw chain on the sprocket. The drive links of the chain should engage the teeth of the sprocket.


Place the tension pin in the lower mounting hole in the saw blade.


Step 6: Install the gear cover

Replace the gear cover so that it is seated properly against the motor housing. Tighten the nut lightly by hand.


Step 7: Tensioning the saw chain

Lift the nose of the guide bar slightly so that the chain hangs slightly. Turn the tension screw clockwise until it stops. The chain should now lie close to the guide rail. The distance to the center of the saw bar should be approximately 1 to 2.15 m millimeters. More practical tips can be found in our article on chain saw tension.


Finally tighten the nut with the wrench.


Video Tutorial: Side Mount Chain Quick Release


Chainsaw Mounting: Front Chain Tensioner


Only a few STIHL chainsaws are equipped with a front-mounted chain tensioner. The procedure is the same as for the side chain tensioner except for the position of the tensioning mechanism.


Step 1: Remove the chain sprocket cover

Step 1: Remove the chain sprocket cover

To install the cutting attachment on your chainsaw first loosen the nuts with a combination wrench and remove the sprocket cover.


Step 2: Release the chain brake

To release the chain brake turn the hand guard towards the carrying handle until you hear a click.


Step 3: Move the tension slider

Turn the now visible screw counterclockwise until the tension slider is back on the gear.


Step 4: Put a chain on the chainsaw

Make sure you are using the combination of guide bar and saw chain specified in your machine's instruction manual. Place the saw chain in the guide bar slot with the nose of the guide bar pointing downwards. Check that the arrows on the chain's connecting links point in the direction of travel.


Step 5: Installing the saw blade

Now place the saw chain on the sprocket. The drive links of the chain should engage the teeth of the sprocket.


Place the tension pin in the lower mounting hole in the saw blade.


Step 6: Installing the gear

Replace the gear cover so that it is seated properly against the motor housing. Tighten the nuts lightly by hand.


Step 7: Clamp the chainsaw

Lift the tip of the bar slightly so that the chain hangs slightly. Turn the tension screw clockwise until the chain is almost at the bottom of the bar. The distance to the center of the bar should be approximately 1 to 23.16'illimeters.


Finally tighten the nuts with the wrench.


Video Tutorial: Front Chain Tensioner


Filling a chainsaw with saw chain oil


Every cordless petrol and electric chainsaw should be filled with a high-quality saw chain oil. The oil is used to lubricate and cool the chain and guide bar over a long period of time. This reduces wear and significantly extends the life of the saw attachment. You do the same with all types of chainsaws. With a petrol chainsaw you should also add oil to the chain every time you fill up the tank. With a battery or electric chainsaw you should check the tank regularly and refill it if necessary. Some STIHL chainsaws have a viewing window in the tank so you can check the level.


Refilling chain oil for the chainsaw


STIHL machines are equipped with a conventional screw cap or a clip-on fuel cap. You do not open and close them in the same way. Here we describe how to use a screw cap. Below you can read how to use a screw cap when filling the tank with fuel. If you have a fuel cap that you can remove without tools you can find more information about this in our article abouttool-free systems.


The following steps describe how to add saw chain oil to the reservoir.

Step 1: Prepare the chainsaw

Place the unit on a flat surface with the fuel cap facing up. Clean the area around the fuel cap with a cloth to prevent dirt from entering the fuel tank.


Step 2: Open the oil tank

Turn the fuel cap counterclockwise and remove the cap.


Step 3: Top up the saw chain oil

Carefully pour the chain oil into the oil tank without spilling. Do not fill the tank to the brim. We recommend using the STIHL filling system.


Step 4: Close the oil tank

Replace the fuel cap over the opening and turn the cap clockwise to tighten. The oil tank is now properly closed.


Stihl Assembling Chainsaw 301

Filling a Gasoline Chainsaw with the Correct Fuel Mixture


A petrol chainsaw needs fuel to start. It is important to fuel your chainsaw correctly to ensure proper operation and safety.

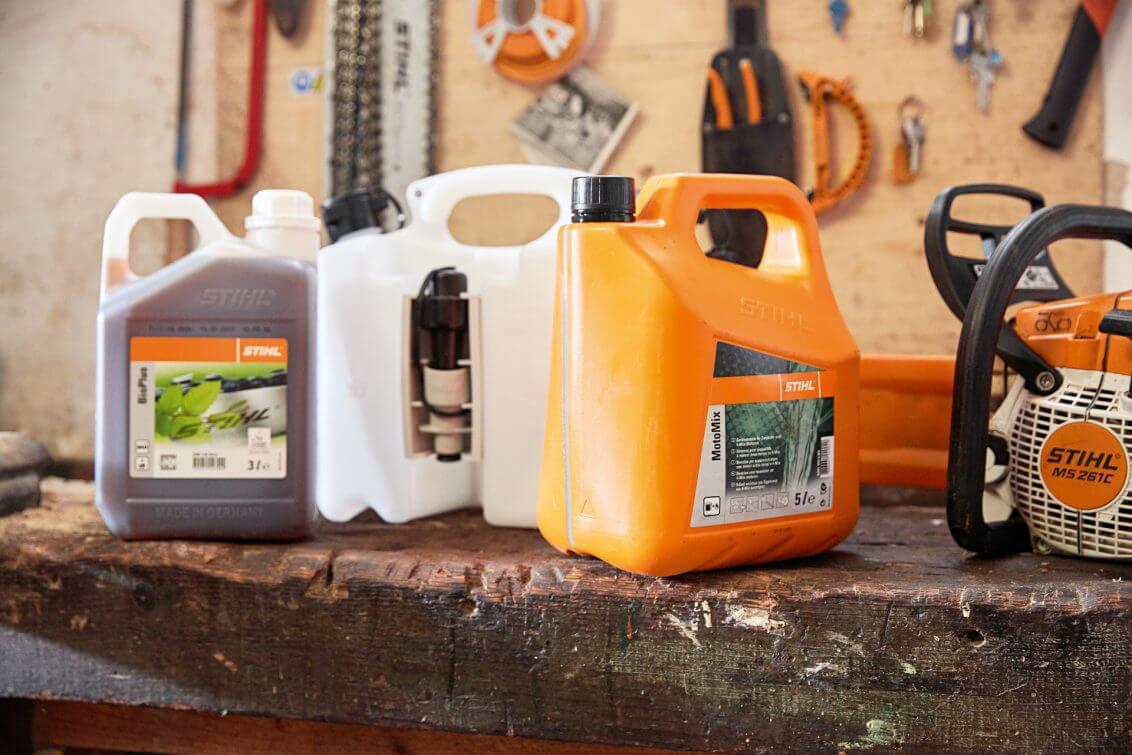
The right petrol-oil mixture: MotoMix


Your chainsaw runs on a mixture of petrol and engine oil. How do you choose the right product and the right quality? The overview of the suitable mixture for the chainsaw shows what you should pay attention to when making your choice.
Stihl Assembling Chainsaw 311

Safety instructions


  • Gasoline is highly flammable. When refueling keep a safe distance from open flames do not spill fuel and do not smoke. Refill the fuel tank at least 300.00 meter from the work area where you start the chainsaw.
  • Always turn the engine off completely before refueling. Do not refuel while the engine is still hot.
  • Open the fuel cap carefully to allow excess pressure to escape slowly and prevent fuel from leaking from the tank.
  • Only refuel the chainsaw in well-ventilated areas.
  • Be careful not to spill fuel or get it on your clothes. If you spill anything clean the machine immediately and change into clean clothes.


How to Fill a Petrol Chainsaw: Instructions


In the following section we will show you how to fill the fuel tank:

Step 1: Prepare the chainsaw

Fill the chainsaw with fuel on a clean flat surface. Lay the machine down with the fuel tank facing up. Clean the cap and the area around the opening with a cloth to prevent dirt from entering.


Step 2: Open the fuel cap

Below we describe how to open and close a fuel cap without tools. Does your STIHL machine have a screw cap? Then follow the description above for filling with saw chain oil.


Open the bracket. Unscrew the fuel cap and remove it.


Step 3: Pour the fuel into the tank

Pour fuel into the tank slowly and carefully. Do not spill fuel and do not fill the tank to the brim. The STIHL fuel filling system is a handy tool!


Step 4: Close the fuel cap

Replace the fuel tank cap over the opening so that the markings on the cap and the fuel tank are aligned. Open the cap all the way and close the holder. Do the markings match? Then the fuel tank cap is closed properly.


Summary: Assembling a Chainsaw


  • Turn off the engine. Remove the battery from cordless machines and unplug the power cord from the electrical outlet. Engage the chain brake.
  • Wear cut-resistant gloves when assembling the chainsaw.
  • The guide rail is identical for both battery-powered and petrol-powered electric chainsaws. The individual steps depend solely on whether your STIHL machine is equipped with a quick-release or a side-mounted chain tensioner.
  • Place the chainsaw on a clean level surface when refueling or adding oil.
  • Do not fill the oil or fuel tank to the brim.


Powered by Syndified
0
    0
    Uw reserveringen
    Je winkelwagen is leegTerug naar de winkel
    This site is registered on wpml.org as a development site. Switch to a production site key to remove this banner.